
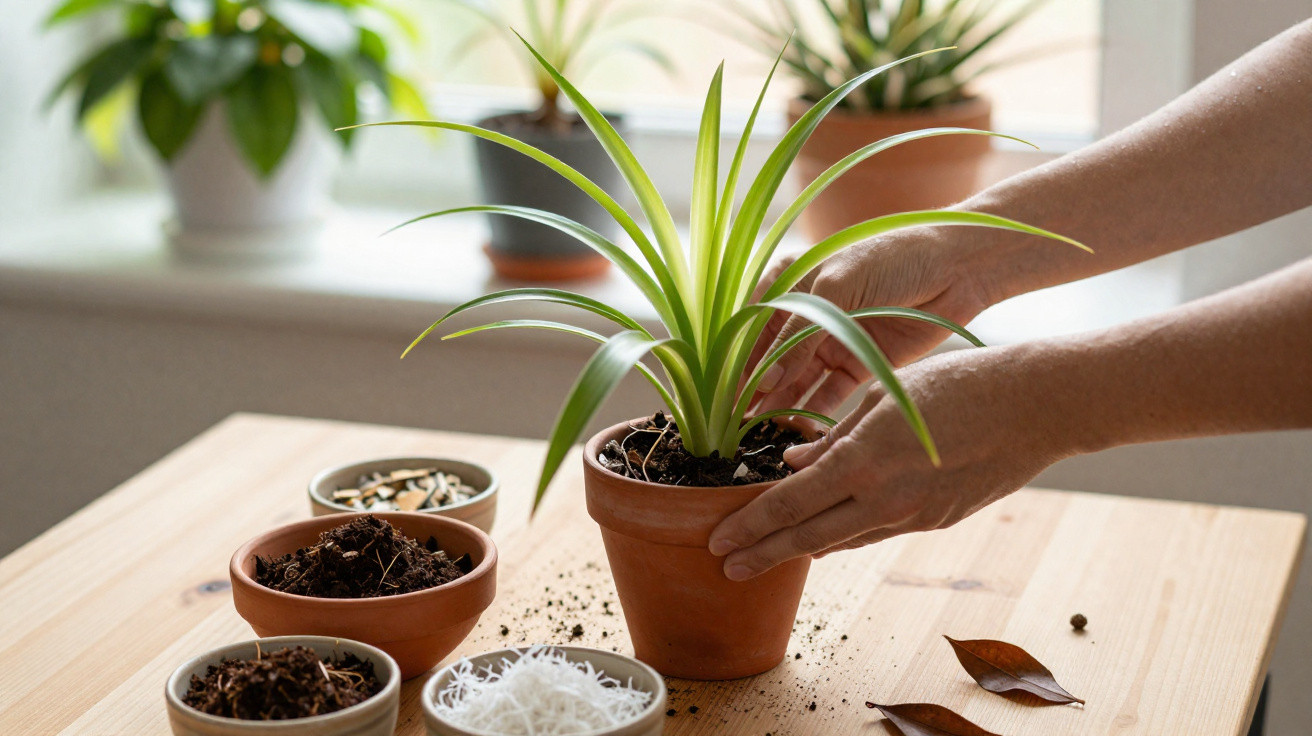
The cause is almost always in the pot, not in the watering can.
Plenty of home gardeners do everything “right” with light, watering and feed - and yet the spider plant suddenly looks tired. Leaves droop, tips discolour, and the once-abundant babies (plantlets) stop appearing. The real issue is often easy to miss: the wrong potting mix can effectively suffocate its fleshy roots. With a straightforward blend of three ingredients, you can turn things around surprisingly quickly.
Why the spider plant so often gets brown leaf tips
The spider plant (botanical name Chlorophytum comosum) is seen as a tough, beginner-friendly houseplant. It copes with the occasional missed watering and is perfectly happy to dry out a little between waterings. But that “hard to kill” reputation often means its needs in terms of compost are underestimated.
Common warning signs include:
- softening, limp leaves
- brown or scorched leaf tips
- fewer and fewer - or no - new offshoots on the long runners
Many people assume the problem is “too little water” or “not enough light”. In reality, something else is frequently going on: in the pot, the roots are not getting enough air because the compost is too dense, too wet or simply too heavy.
"Unsuitable compost can weaken a spider plant, even when watering and placement are actually fine."
Its thickened roots store water and can fill a pot fairly quickly. If those root tubers sit for long periods in wet, compacted compost, oxygen becomes scarce, roots begin to rot, and the plant slows its growth. You’ll usually notice it first at the tips and in the reduced number of babies.
What the perfect compost for a strong spider plant should be like
The best compost for a spider plant has to do two things at once: hold moisture, while still drying out reasonably quickly. Ordinary garden soil rarely manages that. It is heavy, can set hard over time and tends to clump - especially if it contains a lot of clay.
You can recognise a suitable spider plant mix because:
- it stays loose and crumbly
- excess water drains away quickly
- when squeezed in your hand, it won’t form a solid ball
- even after months in the pot, it still feels airy
Good-quality houseplant composts work well, as do peat-free mixes based on coco coir. They keep a stable structure so air can reach the roots and water does not sit in the pot for too long.
The 3-ingredient mix: stop brown tips and encourage babies
The good news: a spider plant doesn’t need an elaborate specialist blend to thrive. A simple three-part mix is enough - and in many cases, leaves look noticeably fresher within a few weeks.
The basic ingredients at a glance
- Green plant/houseplant compost - the foundation, providing nutrients
- Perlite - small, white, ultra-light granules that improve aeration
- Coco coir or another loose, peat-like component - retains moisture while still staying breathable
"The combination of a loose base compost, perlite and coco coir creates airy roots and even moisture."
Step-by-step: how to mix the substrate
- Fill a large container with green plant/houseplant compost.
- Add 1–2 generous handfuls of perlite.
- Mix in a similar amount of coco coir (or another light, fibrous component).
- Combine thoroughly until the texture is clearly looser.
- Squeeze a handful - it should not compress into a firm ball.
Perlite creates small air pockets and stops compost “sticking together” over time. Coco coir holds water without becoming waterlogged. This means the spider plant can draw enough moisture after watering, without sitting in a wet, oxygen-poor environment.
| Component | Purpose |
|---|---|
| Green plant compost | Nutrients, bulk volume, base structure |
| Perlite | Aeration, looser texture, faster drainage |
| Coco coir / similar component | Moisture retention, prevents rapid drying |
The right pot and the perfect timing for the change
Even the best compost won’t help much if the pot is wrong. Spider plants prefer being slightly snug. A pot that is far too large, filled with lots of fresh, wet compost, can feel to the roots like a cold, swampy lake.
How to tell when repotting is needed
- roots are growing out of the drainage holes at the bottom
- the root mass forms a dense “ring” inside the pot
- the compost dries out extremely quickly even though you water regularly
In these situations, switching to the 3-ingredient mix is worthwhile. Choose a pot that is only slightly larger than the current one, and make sure it has generous drainage holes.
How to repot your spider plant without stress
- Ease the plant carefully out of the old pot.
- Gently remove old, heavily compacted compost from the roots.
- Add a thin layer of the prepared mix to the new pot.
- Position the plant so it sits at the same height as before.
- Fill around the sides with compost and press only lightly so air pockets remain.
- Water well, then let the surface dry slightly before watering again.
If you haven’t fed it for months, you can start using a liquid green-plant fertiliser after one to two weeks - at half strength. Too many nutrients in one go can trigger brown tips again.
Common substrate mistakes that hold your spider plant back
Three familiar misconceptions show up in living rooms where spider plants are struggling:
- garden soil in a pot - usually too heavy and dense, often full of clay and microbes
- pure cactus compost - dries out too quickly for thirsty root tubers
- huge pots filled with peat-rich compost - hold vast amounts of water, keeping roots wet for too long
"Overly heavy compost and oversized pots lead to root rot faster than occasionally forgetting to water."
If you’re moving from very wet, compacted compost to an airy mix, keep an eye on how much you water. The new compost dries differently - often more evenly, and a little faster at the top. Water slightly less often, but thoroughly, and pour away any excess water from the decorative outer pot after a few minutes.
How the right compost mix affects babies and overall appearance
A healthy spider plant shows its comfort mainly through two signals: firm, richly coloured foliage and plenty of side shoots carrying young plants. Those familiar long, arching stems with babies appear most generously when roots and leaves are in balance.
In overly wet, compacted compost, the plant scales back growth, focuses on survival, and often stops producing new babies altogether. After changing to the loose three-component mix, many home gardeners report a noticeable increase in plantlets within a few months.
Brown tips on older leaves will not turn green again, but you can trim them back carefully with clean scissors. What matters is that new leaves emerge fresh and without discolouration. That is a clear sign that compost, watering and feeding are now better matched.
Important background information for long-term healthy spider plants
Look closely and you can see how strongly the spider plant’s storage roots resemble those of plants from drier regions. They are designed to absorb lots of water during short wet periods, then cope well with dry spells. Compost that stays soaking wet all the time goes against that design.
It helps to adopt a few simple habits:
- water a little late rather than a little early
- finger test: let the top 2 centimetres dry out
- don’t leave saucers permanently filled with water
- use fertiliser sparingly, especially in winter
If you have several spider plants, you can compare results with the three-ingredient mix: leave one plant in the old compost as a test, and repot another into the new blend. Differences in growth, leaf colour and the number of babies are then easy to observe. This practical comparison helps you build a feel for how substrates behave - not only for spider plants, but also for other houseplants with similar root systems.
Comments
No comments yet. Be the first to comment!
Leave a Comment