
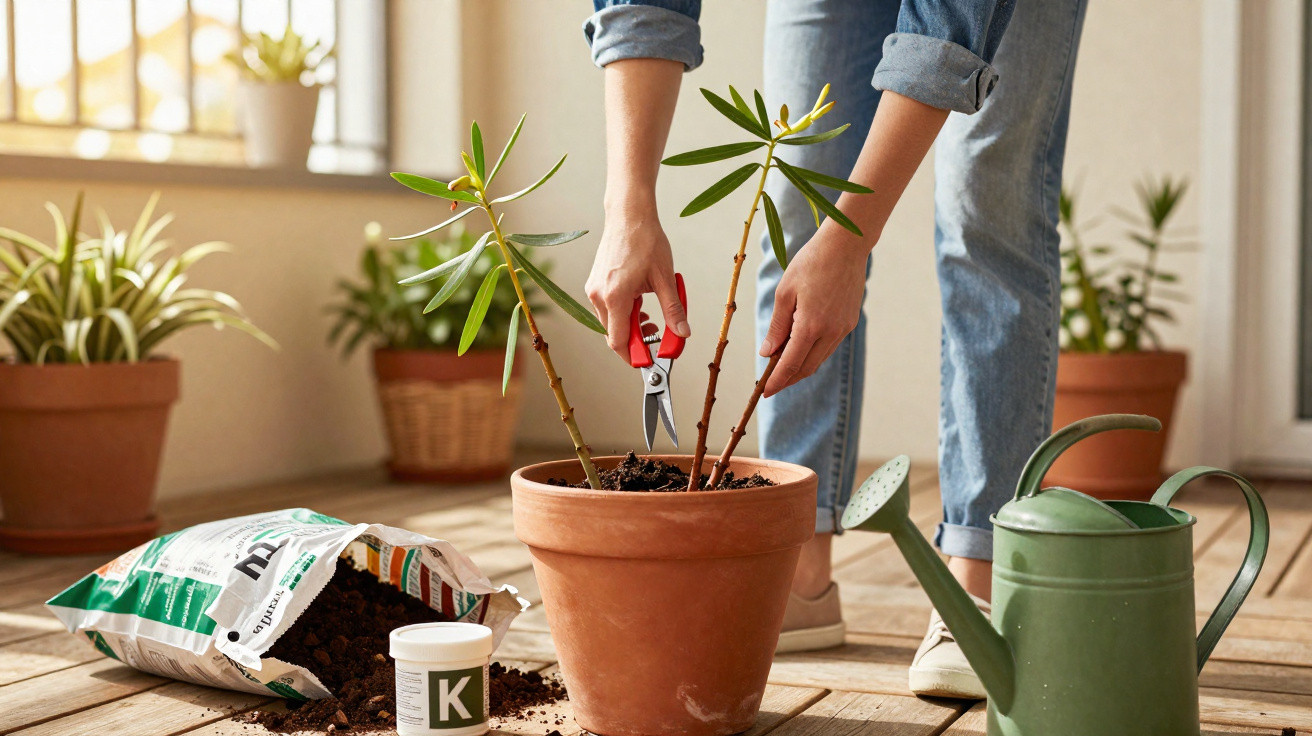
With a few well-chosen steps, this shrub can often be brought back in spectacular fashion.
When you wheel the tub out of the garage in spring, it can be a shock: the oleander that once flowered so abundantly suddenly looks parched-some plants even appear dead. In cooler areas, and especially in pots, this Mediterranean ever-bloomer copes poorly with late frosts. Even so, a sensible plan-checking first, pruning correctly, sorting the roots, feeding properly and watering with care-can bring the shrub back to full flowering strength.
First, check whether there’s still life in the oleander
Before you reach for the secateurs or move the pot back on to the patio, start with a quick health check. From the outside, a damaged oleander often looks worse than it truly is.
The key test is simple: lightly scratch the bark with a fingernail. If you see green, moist tissue underneath, that shoot is still alive. If everything underneath remains brown and dry, that section has died. Repeat this check in several places-especially lower down on the plant.
The most protected parts are usually near the base. Small, slightly swollen buds there are a strong sign the shrub is preparing to restart. If there are no buds at all and even a deeper bark test shows no green, the plant is probably beyond saving.
“If you check carefully before pruning, you only remove what’s truly dead-and you protect the plant’s flowering reserves.”
The gentle move outdoors: slowly adjusting to light and temperature
Many oleanders don’t fail in winter-they suffer when they’re rushed straight outside in spring. What the plant needs is a kind of “acclimatisation training”.
A good rule of thumb: don’t move it out of its winter shelter until nights are reliably above 10 °C and the risk of frost has largely passed. In many areas that’s roughly late March to mid-April, though exposed sites may need longer.
- First few days: place the pot in partial shade for 2–3 hours.
- After about a week: increase the time outdoors, still sheltered from wind.
- Then: choose a final spot in full sun-oleander thrives on heat and light.
If you take the shrub straight from a garage into harsh midday sun, you risk leaf scorch and unnecessary stress. For plants in the ground, remove winter protection gradually while keeping an eye on the forecast. If a final cold snap is predicted, temporarily cover the plant again with horticultural fleece.
Spring pruning: remove old damage and encourage young growth
Once you know which parts are still alive, the most important job follows: pruning. This step often determines whether the oleander rebounds quickly or continues to struggle.
How hard can you cut it back?
Remove all shoots that are black, mushy or completely dried out-cutting back to exactly the point where the bark test shows green wood again. If branches cross, keep the stronger one and take the weaker out. Overlong shoots with sparse foliage can be shortened by one-third to two-thirds.
If the shrub has been badly damaged, the only option may be a severe cut back to about 40 centimetres. It can look brutal at first, but it often triggers strong new shoots from the base. Flowering may be limited that year; however, the following season the oleander typically returns much sturdier and denser.
“A brave post-winter cutback often decides whether an oleander dwindles-or makes a proper comeback.”
Fresh pot, fresh energy: repotting in spring
For potted oleanders, lack of space can become a bigger problem than frost. When the roots are completely bound up, a slightly larger pot can achieve more than any fertiliser.
When repotting is necessary
- Roots are growing out of the drainage holes.
- When you lift it out, you see a tight root ball with hardly any free compost.
- The shrub dries out extremely fast, despite a normal-sized pot.
In these cases, move the oleander into a slightly larger container-one or two sizes up is enough. Oversized pots stay wet for too long, increasing the risk of root rot.
A suitable growing medium is a blend of flowering-plant compost, coarse sand or fine gravel for drainage, plus a little well-rotted compost. A layer of expanded clay or gravel in the base helps excess water drain away.
If the container is already huge and difficult to handle, a partial refresh can be enough: remove the top 5 centimetres of compost and replace it with a fresh, nutrient-rich mix. That lifts the nutrient bottleneck and gives the plant new momentum.
Feeding with a plan: why potassium matters most now
After winter, oleander needs feeding-but it needs the right sort. A fertiliser that’s all nitrogen can produce lots of soft green growth, but it can also make the plant more vulnerable to disease and cold.
From March to September, choose a feed with a higher potassium content-such as a dedicated flowering-plant fertiliser or a specialist oleander feed. Feeding once or twice a week works well, always applied to slightly moist compost and never to bone-dry roots.
“Potassium strengthens shoots and leaves, improves flowering, and makes oleander more resilient to weather stress.”
Watering correctly: balancing drought and waterlogging
A weakened oleander is particularly sensitive to watering mistakes. Too much water can be almost as harmful as too little.
Basic rules for healthy moisture levels
- In pots: water only once the surface has dried.
- Water slowly and directly on to the root area, not over the leaves.
- Empty the saucer after a few minutes so water doesn’t sit underneath.
- In the ground in summer: usually two deep waterings per week, adjusted up or down depending on heat.
A mulch layer of bark chips or gravel around the plant helps the compost stay moist for longer and shields roots from sudden temperature swings. During very hot spells, potted oleanders often benefit from a morning watering and, if needed, a second in the evening-brief, but thorough.
The right position: sun, warmth and a mild microclimate
Oleander comes from regions where summer heat is the norm. If you want abundant flowers, give it as much sun as possible.
The best choice is a fully sunny spot, ideally near a south- or south-west-facing house wall. The wall stores warmth and releases it overnight. Exposed, draughty corners or persistently shady positions noticeably reduce bud formation.
| Site factor | Recommendation for strong flowering |
|---|---|
| Light | Several hours of direct sun every day |
| Wind | As sheltered as possible, especially in winter |
| Ground | Free-draining, not permanently wet |
| Surroundings | Heat stores such as walls and patio paving are beneficial |
Common mistakes that stop flowering altogether
Even with the best intentions, many oleanders fail to bloom well. The cause is often a handful of small, repeat mistakes that are easy to fix.
- Moving the plant outside too early, leading to late-frost damage on young shoots.
- A sudden switch from winter quarters to blazing sun without gradual adjustment.
- Constant water sitting in the saucer, leaving roots with too little air.
- Overfeeding, especially with strongly nitrogen-heavy products.
- Cutting all shoots back severely every year, so no flowering-ready wood is left.
Avoid these pitfalls and you give the shrub the chance to turn into a true ball of flowers from May through to autumn.
What oleander fans should also know
Oleander is considered a fairly tough container plant, but it does have its traps. One point is often overlooked: every part of the plant is poisonous. Children and pets should not be able to chew leaves or reach fallen clippings. Wear gloves when pruning and clean tools afterwards.
Another important detail is that the shrub flowers mainly on the previous year’s growth. If you cut too hard every spring, you remove a large share of the season’s potential flowers. It’s better to reserve a heavy prune for after harsh winters, then thin more moderately in the years that follow.
If you keep several tubs, a small trial can be worthwhile: treat one plant very consistently with potassium-rich feeding and careful watering control, while caring for another more “normally”. The difference in sturdiness, leaf colour and flower abundance by midsummer is often clear-and it helps you build a better feel for what the plant needs.
Once you know your oleander well, you can often tell as early as February-while it’s still in winter shelter-how it has come through the cold, and adjust spring care accordingly. That way, this Mediterranean classic remains a reliable focal point for years on a balcony, patio or in the garden.


Comments
No comments yet. Be the first to comment!
Leave a Comment