
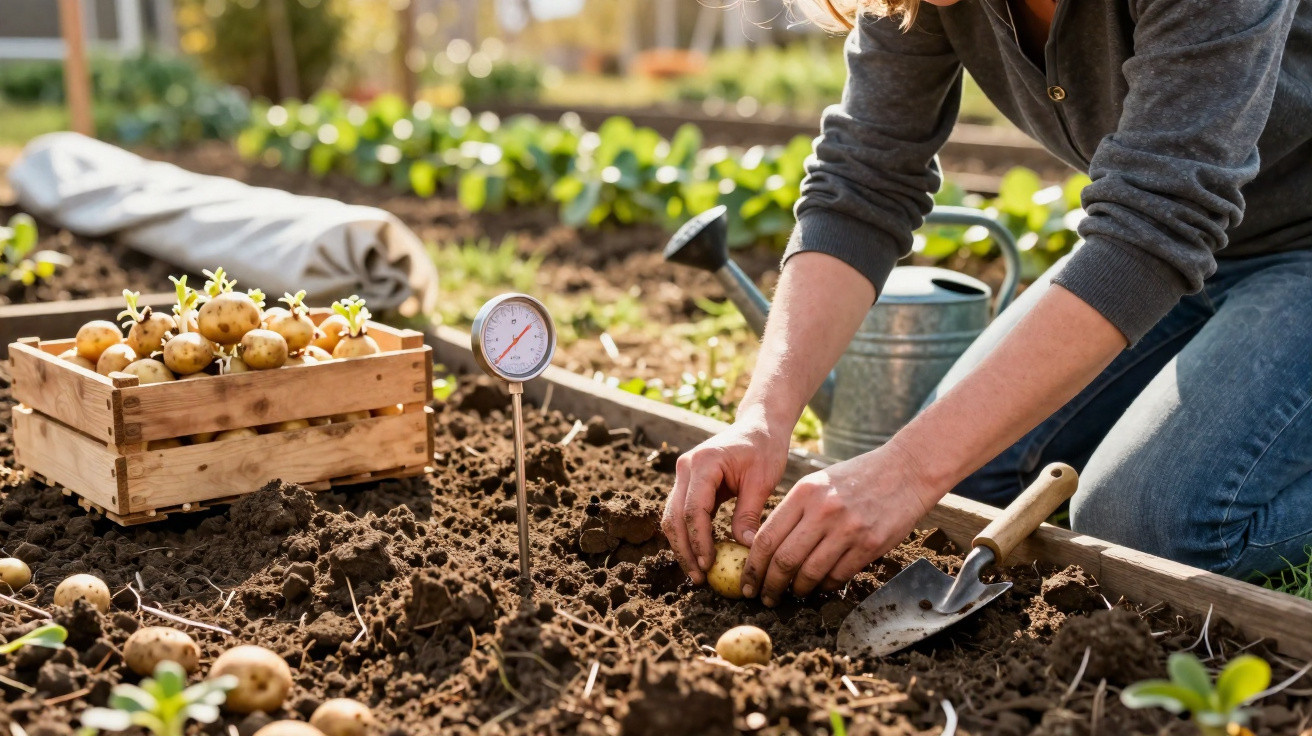
Between the figures on seed packets, tips from the neighbour and advice from a moon calendar, it’s easy to lose track in spring. Plant too early and you’ll be pushing tubers into icy soil. Leave it too late and you’ll miss out on delicate early potatoes. An experienced vegetable grower explains what actually matters - and why a thermometer in the soil tells you more than any calendar ever will.
The right time: follow the soil, not the calendar
The question “when am I allowed to plant potatoes?” doesn’t have one universal answer for every garden. What counts isn’t the date, but the temperature 10 centimetres down.
The professionals’ rule of thumb: potatoes only go into the ground once the soil there has consistently reached at least 7 to 10 °C.
If you want to be absolutely sure, use a soil thermometer from a garden centre. They’re inexpensive, yet they can save you from costly mistakes. Once you’re around 10 °C, the odds are strongly in your favour.
A rough timetable for Germany, Austria and Switzerland (in typical years):
- Mild regions, coastal areas, wine-growing climates: often late March to early April
- Mid-altitudes, many towns and cities: usually mid-April to early May
- Cooler areas, low mountain ranges, higher altitudes: more like late April to mid-May
A simple body-check can help as a bonus guide: if you can sit on bare soil for a few minutes without feeling cold, the timing is often about right. When in doubt, wait a week rather than planting into chilly, wet ground - potatoes hate cold at the roots.
Use simple tricks to warm the soil earlier
If you’re impatient and want the earliest possible harvest, you can give nature a nudge. A common professional approach is to pre-warm the planting area.
- Lay black plastic sheeting: a dark cover can raise the temperature by 2 to 3 °C.
- Use horticultural fleece: garden fleece holds warmth in the soil and helps protect against late frosts.
- Raised bed or ridged bed: built-up beds heat up faster than flat ground.
With these methods, planting often moves forward by one to two weeks. If you don’t like using black plastic, you can opt for dark bark mulch or old dark boards that absorb heat during the day.
Good soil: loose, fertile, never waterlogged
Timing alone won’t deliver a heavy crop. Potatoes need a loose, deep soil where water can drain freely. A quick test shows straight away what your bed is like:
- Take a handful of soil and squeeze it.
- If it forms a hard, greasy lump, there’s a lot of clay and loam.
- If it crumbles back apart, the structure is better.
If your bed is very clay-heavy, only consistent soil improvement will help in the long run. Professionals recommend:
- In autumn, spread 3–4 centimetres of well-rotted compost.
- Work in some sand or fine grit to reduce waterlogging.
- Grow potatoes on the same patch only once every four years to slow disease build-up.
After heavy rain, water should not be left standing for long. Waterlogging quickly leads to rot, and the tubers can stay small or become misshapen.
Choosing the right seed potatoes
A common beginner’s mistake is buying eating potatoes from the supermarket and simply putting them in the ground. These tubers are often treated so they don’t sprout on the shelf. For the garden, they’re rarely a good choice.
For a healthy harvest you need certified seed potatoes - virus-free and true to type.
You’ll find them at specialist suppliers and often in well-stocked DIY and garden stores too. As a rough guide: 1.5 kg of seed potatoes can produce 10 to 20 kg of potatoes, and in ideal conditions even more.
Chitting gives you a clear head start
If you want to bring the harvest forward, chitting is the way to do it - and it’s simpler than many people expect:
- Begin 4 to 6 weeks before your planned planting date.
- Place the tubers in shallow trays or empty egg cartons.
- Keep them somewhere bright but cool - about 10 to 15 °C.
- The shoots should stay short and sturdy, around 1 to 2 centimetres long.
Done this way, plants typically gain a one- to two-week advantage once they’re in the bed. In some cases, early potatoes can then be on the plate as soon as June.
Planting day, step by step
On the day you plant, the weather matters all over again. The soil should be dry on the surface, yet still slightly moist within. If it’s too wet, it smears and compacts too easily.
| Step | What to do |
|---|---|
| 1 | Loosen the bed, removing large stones and root scraps |
| 2 | Draw shallow furrows, about 10 to 15 cm deep |
| 3 | Place seed potatoes in with the shoots facing upwards |
| 4 | Row spacing about 60–70 cm, spacing within the row about 30–35 cm |
| 5 | Cover with soil and firm lightly, but don’t stamp it down |
Choose a fully sunny position. Potatoes will still grow in partial shade, but they’re often smaller and take longer to mature. On balconies, large containers or sturdy sacks with drainage holes can work surprisingly well - but the compost needs to be especially loose.
Earthing up: the underestimated yield booster
Once the young plants are about 20 centimetres tall, an essential job comes next: earthing up. This means pulling soil up from the sides so a small ridge forms along the row.
Earthed-up potatoes produce more tubers, stay protected from light and are less likely to turn green.
Repeat the process a few weeks later when the shoots have grown again. In a container it works the same way: add loose soil or compost in layers until only the tips of the plant are still visible.
What to do in frost risk and dry spells
Late frosts are among the biggest spring risks. If shoots are already above ground, act quickly:
- Cover young plants with horticultural fleece.
- With a light frost, mound soil over the shoots, then uncover them slightly once the cold snap has passed.
- For container-grown potatoes, move pots close to house walls, where it’s usually milder.
During dry periods, water less often but more thoroughly. It’s better to give a deep soak once a week than a small splash every day. The key phase begins when the plants start to form flower buds - that’s when the tubers develop underground.
When the crop is ready - and how varieties affect timing
Planting time only does half the work; the variety does the rest. Early potatoes usually take about 90 to 110 days from planting to harvest, while mid-season and late varieties need significantly longer.
Typical signs that potatoes are ready to lift:
- The foliage turns yellow and starts to flop over in places.
- The skin on the tubers no longer rubs off easily.
- A careful test-lift with a garden fork shows a good tuber size.
If you only want a few early potatoes, you can lift individual plants sooner and leave the rest to size up further.
Why potatoes are so reliable in the home garden
Potatoes are among the most rewarding crops for hobby gardeners. They suppress many weeds, their roots help loosen the soil, and they give a high yield per square metre. Even in the smallest spaces, you can achieve a lot with containers, planting bags or mixing tubs.
They also help children understand the cycle of life in the soil: from an unremarkable tuber to a bucket full of earthy treasures is just one summer. Choose the right planting window, prepare the bed properly and earth up regularly, and by late summer you’ll be lifting crate after crate of potatoes - no high-tech required, just careful observation and a bit of patience.

Comments
No comments yet. Be the first to comment!
Leave a Comment