
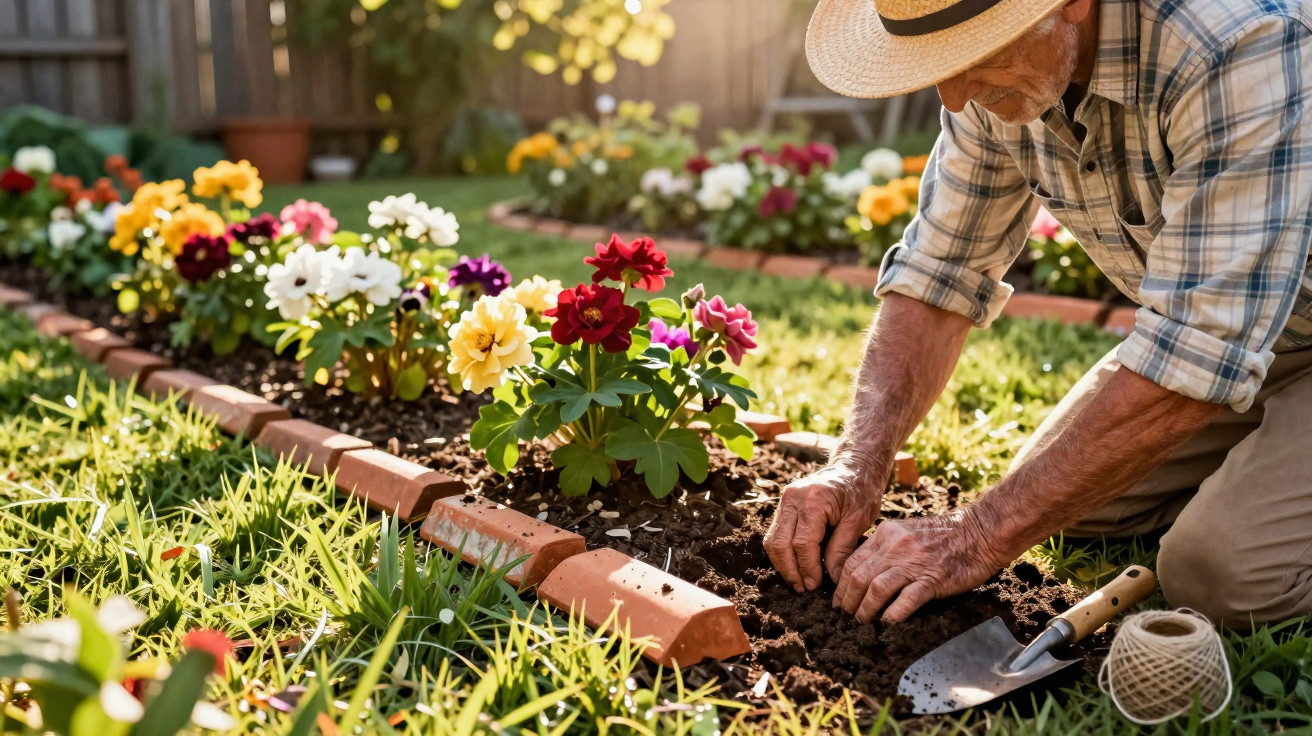
On a spring morning in a slightly timeworn garden, you may notice an odd line of roof tiles set upright around peonies, irises or an old rose bush. Barely rising above the soil, they are marked with moss and look as though they were put there simply out of habit. Yet our grandparents did not use them as decoration. They understood a straightforward practice, passed on without manuals or videos: making a useful boundary between a flower bed, the lawn and plants that spread too freely. Fifty years later, while plastic edging cracks at the first frost and rolls of geotextile pile up in garden sheds, this method is quietly returning to gardens. Its practical sense remains undiminished.
These tiles were not placed there just for looks
We all know the moment when grass starts encroaching, centimetre by centimetre, until it smothers carefully planted small perennials. Gardeners in the past would drive flat tiles, often salvaged after roof repairs, into the ground all around their beds. This modest buried barrier slowed creeping roots, kept soil in place and created a clean edge without making the garden resemble a rigidly staged setting. From a child’s height, it was barely noticeable. From a gardener’s perspective, it made all the difference.
In some country homes, the tiles were set 15 to 20 centimetres deep, with only a few centimetres left visible. One gardener from Dordogne still recalled how her father used old half-broken pantiles around strawberry plants: the lawn spread less quickly, while the fruit stayed cleaner after rain. It was not a sophisticated technique. It was an immediate answer to an ordinary problem: saving time without buying equipment.
The logic is sound. A buried tile creates a physical obstacle for the shallow roots of lawn grass, couch grass or certain particularly invasive ground-cover plants. On gently sloping ground, it also slows run-off, since fine soil is less easily washed out of the bed. Terracotta is not impermeable, avoiding the “sealed container” effect sometimes produced by metal or plastic edging. A garden breathes better when you do not try to lock everything down.
A rustic edge that genuinely helps day to day
To recreate this method, simply dig a narrow trench around the outline of the flower bed, ideally 15 to 25 centimetres deep. Position the tiles almost vertically, tilting them slightly outwards if you want the mower to pass more easily. Then firm the soil around them, with no cement or complicated fixings required. An old flat roof tile is ideal, though a cut pantile can work just as well. The key is to make an unbroken line, without wide gaps between the pieces.
A common mistake is leaving the tiles too high, turning them into a miniature fence. They then get in the way of the mower, catch your foot and make the bed look rather harsh. It is better to leave just two or three centimetres exposed, enough to show where the division lies. Let us be honest: nobody really does this every day. The appeal of this approach is precisely that it calls for one productive afternoon, then very little attention for several seasons.
Old tiles offer another subtle benefit: their uneven surface holds mulch, fallen leaves and soil a little better than smooth edging. They can also become a small shelter for insects, especially if you avoid over-cleaning every corner. A garden does not need to be immaculate to be beautiful. A successful border remains practical while blending into the background.
“My grandfather used to say that a tile in the soil was worth more than a long speech about weeds.”
- Choose untreated tiles, with no recent paint or unknown products.
- Push them deep enough into the ground to slow lawn roots.
- Avoid sharp edges near areas used for walking.
- Reuse broken pieces instead of throwing them away.
The return of common sense in flower beds
This old practice appeals today because it meets a very modern wish: using what is already at hand, without turning the garden into a permanent building site. A stack of tiles forgotten behind the garage can serve a purpose again instead of being taken to the tip. There is something reassuring about that. Rather than chasing catalogue-perfect results, you work with the material, the seasons and the small constraints of the home.
A buried tile cannot solve every problem. It will not be enough on its own against running bamboo, bindweed or an invasion established for years. Around a perennial bed, rose bush or patch of flowers, however, it reduces repeated chores and makes the outlines easier to see. It is a modest solution, but a remarkably long-lasting one. It is easier to understand why it has endured for decades, far from trends and packaging promises.
These lines of terracotta also carry a trace of memory. They evoke a time when materials were kept “just in case”, when a cracked tile was not yet waste but simply an object that could be useful in another way. Trying this tip may mean viewing your garden differently: what can be repaired, slowed down or defined without buying more? The liveliest flower beds are often those where a little moss is allowed to settle between two tiles.
| Key point | Detail | Added value for the reader |
|---|---|---|
| Root barrier | Buried tiles slow the advance of lawn grass and shallow roots. | Less weeding around the edges of flower beds. |
| Reclaimed material | Old flat or broken tiles can be reused. | An economical, durable edging option that creates less waste. |
| Simple installation | A trench 15 to 25 cm deep is sufficient, with little of the tile left visible. | A discreet result that works with mowers and planting schemes. |
Also read: Gardeners used to sink tiles around flower beds: 50 years later, gardeners know why


Comments
No comments yet. Be the first to comment!
Leave a Comment